
Happy Hands: What Smarty Pants People Say About Kids and Tools
One afternoon a friend who was teaching second grade at the time and I were talking about classroom activities. “…You know,” she said, her eyebrows scrunching into a slightly worried shape, “it’s been three days since my students touched a tool other than their screens – no pencils, no scissors, no glue. That can’t be good.”
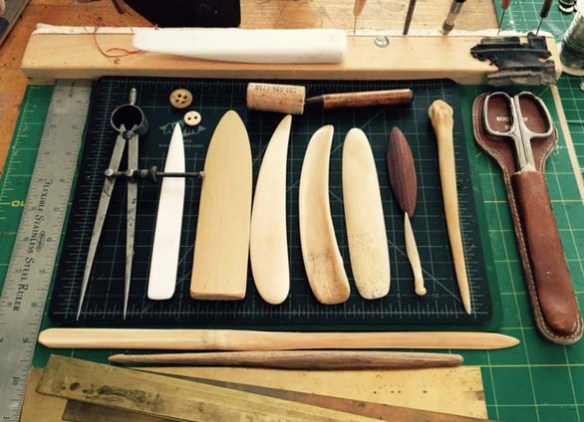
 “Happy Hands” Roberta Lavadour 2010
Now, maybe it’s just me projecting my own “I must be doing something with my hands at all times” figety-ness onto the masses, but I’ve always been convinced that one of the best ways to engage students in learning is to get their hands moving. Turns out, experts who study the haptics of learning agree.
“A large body of research in neuroscience, biopsychology and evolutionary biology
demonstrates that our use of hands for purposive manipulation of tools plays a constitutive role in learning and cognitive development, and may even be a significant building block in language development.” ~ Anne Mangen and Jean-Luc Velay (2010)
The most basic tool we associate with learning is the pencil, and there’s a wealth of information on how handwriting “trains the brain,” as Gwendolyn Bounds of the Wall Street Journal puts it. Her 2010 article provides a brief outline of the idea. If you want a more scholarly look at the subject, Karin James and Laura Englehardt’s paper, The Effects of Handwriting Experience on Functional Brain Development in Pre-Literate Children dives deeper.
In beginning bookmaking classes we use scissors, bone folders, glue sticks, and sewing needles.I know that many artists aren’t enthusiastic about letting a gang of squirrely second-graders get their hands on good tools, but I’ve found that kids generally rise to the occasion, and the occasional mishap is just the cost of doing business. Real tools communicate to students that they are doing real work, and the more kids are socialized to the idea that art and fine craft is important work, the better. Using a bone folder, as opposed to a popsicle stick, is a real joy that we often take for granted. I’m not going to say that I haven’t winced at the sound of a bone folder hitting the concrete floor, or spent time with sanding tools repairing chips, but seeing the confidence that kids gain when they are trusted with tools make it all worthwhile.
Many of our projects transform paper into tools in their own right. Tools for learning, tools for expression, and tools for sharing students’ delight in their discoveries with others. In some classes, we take on the ideas of publishing and democratic multiples. Being able to make one book is satisfying, but being able to publish an edition that can be widely distributed – that’s a powerful achievement. Editioning introduces kids to the next level of tools and techniques, from something as simple as a copy machine to the use of printmaking tools required for woodcut, silkscreen, or collagraph projects. Having many copies to share with friends and family can also serve to broadcast information about the good work being done in the classroom to those families who aren’t engaged with the school, for whatever reason.
The confidence that kids (and adults!) gain by becoming proficient with tools serves them well when facing other obstacles that require creative problem solving. In art, we set up the obstacles ourselves. In life, the more tools you have in your bag, the more confidence you’ll have that you can overcome just about anything. Making handmade books in the classroom, and integrating them with learning goals and regular, required classroom content, is easier than you think.
Step 1: Get Ready, and Find a Classroom
You may assume that once you’ve established yourself as a book arts expert, you’re ready to search out opportunities to teach. But teaching is a skill that that even some really great artists don’t possess. Many of the skills that are essential for being a good instructor – punctuality, organization, time management, follow through – are those typically NOT associated with artists. If you’re one of the lucky people who have a good balance of left brain and right brain strengths, great! If not, you might want to start small and see if teaching is a good fit for you. The Alaska State Council on the Arts has a helpful online guide for artists that includes a short self-assessment.
It’s also good to take the time to understand which age groups are the best fit for your skill sets and temperament. It’s amazing how quickly a couple of kids can make you feel like crap about yourself. Teenagers can be particularly difficult, especially if you are going in for a short-term project. Younger kids tend to be like dogs – i.e., friendly, wanting acceptance and affection – and older kids tend to be like cats. It can take time to build friendly relationships with teens, and in the meantime, you need a thick skin and the self-assurance that you’re providing something valuable, regardless of a lack of positive feedback.
A good way to get your feet wet is to volunteer to be a studio assistant for an artist who has a reputation for being a great teacher. In exchange for prepping materials and helping clean up you’ll be able to see materials management, instruction, and classroom management techniques in action.
If you plan on working for several organizations, it often makes sense to work as an independent contractor. Make sure you qualify to be paid as an independent contractor AND that the terms offered cover things like taxes and overhead. If you’re not sure what being an independent contractor entails, check it out here.
The first thing you may need to do is expand your idea of what a classroom is. If you’re up for non-traditional classroom settings, your local arts organizations can be good resources. Many organizations serve home-schoolers, day treatment centers, youth summer camps, senior assisted living centers, and other groups and venues. By getting on their radar, they can refer students looking for one-on-one instruction as well. Event planners and convention center personnel can help connect you with corporate gigs, and travel industry professionals can help you explore things like destination crafting.
If traditional K-12 classrooms are more your speed, the best thing to do is to connect with an enthusiastic teacher who can help you navigate administrative hoops. This is one time when starting at the top is usually not the best idea. Top-down art activities that teachers are asked to shoe-horn into their incredibly busy schedules are seldom successful. Having an administrator in your corner is nice, but having a teacher sing your praises to his/her peers is the gold standard of promotion.
Artist’s residencies can be a good fit if you are able to be away from home and/or a day job for a week or longer at a time. Many arts organizations run Artists in the Schools programs, maintaining a roster of artists that are marketed to school districts in their region. A residency can be a great way to immerse yourself in a community and really get to know the students, staff and parents a bit. They can also be exhausting, so make sure your energy level is up to the task. When budgeting, be sure to look at things like dog-sitting, restaurant meals and the other hidden expenses of being out of town.
Interview your prospective employer or host organization to make sure they have their ducks in a row. Being asked to work alone in a setting where you aren’t familiar with safety and emergency procedures, where there are students with special needs you aren’t trained to handle, or in large classrooms that require more management than one person can provide should be red flags. A reputable organization will always provide on-site support staff for visiting artists.

Make sure that you have good photographs or illustrations of the proposed project so that the organization you partner with can effectively promote your class. If you have good layout and design skills, you may want to offer to help with posters, mailers, and images for social media distribution. Be sure to provide a clear and engaging written description of your class offering that the venue staff can just copy and paste.
Step 2: Prepare Your Projects and Materials
- Each class requires a different level of preparation – decide early if your students are going to start from scratch or work from a more pre-fab kit.
When planning activities for a classroom setting, it’s always good to start simple, allowing plenty of time for the main project and having a simple bonus project or two ready to go in case the group gets done early. The biggest thing that will torpedo your experience, and that of your students, is to be too ambitious. Unless you are leading a master class of experienced adults, keep things simple and allow plenty of time. When students and the instructor are stressed out, it’s no fun for anyone. I have one strict rule I try to adhere to: No one cries in my class.
I am a big advocate of using the best materials that you can, given the budget for the project. Even when your students are making a set of samples, stay away from copier and construction paper. Something as simple as using reclaimed ledger paper, or a custom color of cardstock instead of those icky pastels can transform a project. Some instructors see a materials fee as a convenient way to pad their income, and most students are on to this tactic in pretty short order. Charge what the materials actually cost, and if you have some left over at the end, divide them between the students.
That being said, when working with adults, I highly recommend preparing enough materials (at your own expense) to put together twice as many project sets as you actually need. Many students, especially in rural areas, don’t have access to things like good paper, binder board, or the tools (like board shears) for prepping materials properly. They will appreciate being able to purchase a set of quality materials so that they can practice their new skills at home, and there’s no reason you can’t mark the kits up, especially if they come with something extra, like a small, basic bone folder.
For classroom projects, where budgets can be tight, you can get a lot of mileage out of building a relationship with someone at the local print shop. Offcuts from commercial jobs are often large enough for a variety of projects and usually end up in the recycle bin. I usually wait to plan projects until I’ve had a look in the recycle bin, then plan everything else around that. While it’s tempting to stock up on stuff when it’s free, be careful about taking more than you’ll use in a relatively short time. I’m always reminded of my daughter’s friend asking me in class one time, “Is this the paper that I had to sit on when you gave me a ride home last week?” Let the print shop be the storage space, and keep your own workspace (and car, and garage, and dining table!) clear of clutter.
One thing that I fully support hoarding is alternatives to adhesive, which is often the most expensive part of a classroom project (35 gluesticks x $2.59 = $90.65!) Double stick framer’s tape, mailing labels, mailing dots and other sticky fixes can save a lot in the long run, and they eliminate the mess and drying time of white glue (Elmers) or glue sticks. Of course, understanding suitable stable and/or reversible adhesives is part of any good bookbinding class, so don’t skimp if the purpose of the class is formal skill building.
The adage of measure twice, cut once is even more important when prepping materials for others. You don’t want to wait until you’re in front of 30 students to realize that the covers for your book aren’t going to fit because of an error.
TIP: Always be aware of projects that might present an inadvertent safety hazard. Book structures that require cuts in the center of an unfolded page for things like windows can be especially problematic. One way to mitigate this, especially for books created from a single sheet of paper, is to drill a nice size hole with a drill press through the entire stack of papers. That gives scissors a nice little place to tuck their noses into to begin a cut.
I got a great tip from Susan Kapuscinski Gaylord once that I’ve used many times over the years; put the materials for students in clear Ziploc bags with a sticker on the front listing everything that needs to be returned to the kit.

TIMESUCKS:
- Threading needles (thread them ahead of time)
- Re-threading needles (make sure you have 10-12 spares)
- Measuring (include a marked template in the kit)
- Providing too many choices (keep paper and other selections simple)
If you’ll be in a classroom more than one day, always count on 2-4 students missing a class. Come to each session armed with projects that are at the same level of progress as the rest of the students. That way, kids can jump in and not feel singled out or left behind.
If you’ve got a materials preparation tip you’d like to share, leave a comment.
Lights, Camera,…Action!
So, you’re ready to get up in front of a crowd and lead them through a book-making project! Here are a few things to make sure you’ve done ahead of time:
- Treated yourself to a simple manicure. Nothing saps your confidence like realizing as you start your presentation that your hands look like the Crypt Keeper’s
- Practiced leading a friend through the project from beginning to end, editing instruction notes as needed
- Checked to see that workspace is sufficient, and room temperature is pleasant
- Prepared extra large visual aids for demonstrating small, nuanced techniques, like tailored corner coverings
- Allowed each adult student to introduce her/himself and express what s/he expects to get out of the class
- Outlined the day’s/session’s schedule for the participants
- Identified a source for water and the restrooms
Try to keep the instructions simple, clear, and straightforward. Here’s a short video of instructions for a Japanese Stab Binding that illustrates some of the concepts in prior blog posts, and should give you a good idea of how I break down instructions into small steps:
There are a few things you may have not have noticed that were essential to making this a simple project for students. First, I made sure that both paper selections were cut to exactly the same size (few things are worse than realizing that covers don’t fit). Second, all the text block paper and cover paper was carefully drilled with a drill press to that there was no punching required. I was careful to use a drill bit that would make a hole that was just large enough for the needle to pass through easily, keeping in mind that in some spots, the needle had to pass through twice. Many older students struggle with hand strength, and struggling with too-small sewing holes can result in broken needles, frayed thread, and frustrated students. Third, I was careful to use clear, precise, consistent language throughout. It’s surprising how confusing it can be sometimes if you use even simple words like “into,” and “through,” interchangeably.
Kits were prepared with the binder clip included, the needle was already threaded, and the decorative cover papers made the finished book nice looking, even though it was just a small, simple project.
Stay tuned for more posts with instructions for some of my favorite projects, along with some creative classroom management techniques.

Thanks Roberta, I just made one of these. It’s good to know I did it right!
Stepheanne Arbogast
LikeLike