
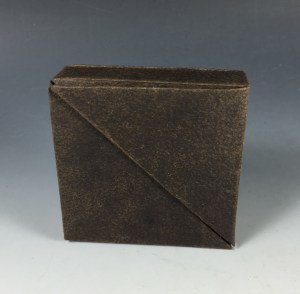
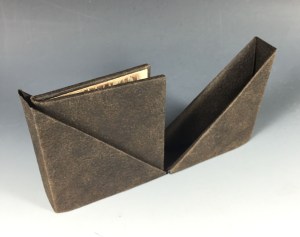
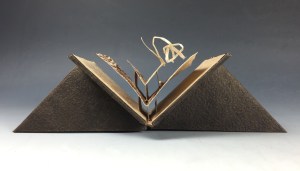
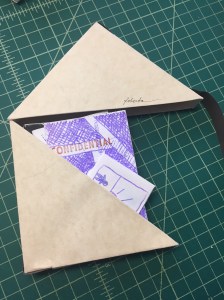
I designed this protective box during the 2004 Paper and Book Intensive so that the students in my Breathing New Life into Dead Media class would have a place to collect their class samples. It’s so simple that I’m guessing it isn’t new, but it’s been a good little structure, and I wanted to share. One nice feature is that the finished box, if it is wide enough, provides a perfect 90-degree-angle cradle for displaying the book.
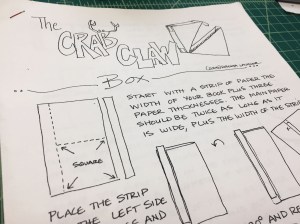
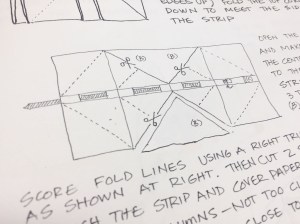
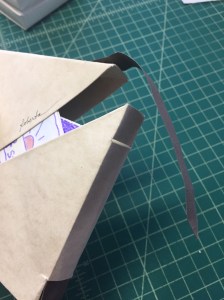
The instructions were hand-written late at night in my dorm room – forgive the illustration; there may have been some alcohol involved. The initial structure was designed to have a strap that was woven into the edge, providing a simple tab closure. (If you were in my class you may notice a bit of image editing since the original photocopies.) I’ve found since then that if the box is sized properly, it stays snugly shut on its own, and that straps and slots rarely stand up well to frequent handling.
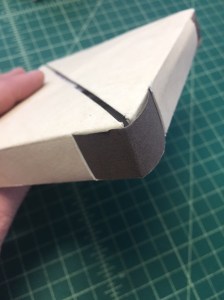
The original one from class, pictured above, has held up well after more than a decade of being handled many times over the years by students of all ages.
So, here’s a quick how-to video. If you have questions or comments, feel free to email me, robertalavadour (at) gmail.

practice makes perfect with folding paper.
LikeLike
Thanks so much for the note. Would love to see what you come up with.
LikeLike
Dear Roberta,
thanks for your tutorial for the fantastic crab-claw-box! I love it! I tried first, to produce it with a thin paper, just to know, how to work. I did not take the right measurements. So I startet again. It is fascinating, that there is no glue needed. My box is made of paper (180g/qm) with a velvet band, because I did not trust the closure.
Unfortunately i did not succeed in showing the fotos.I am very happy with this box and I will do it again!
Many greetings from Germany!
Yours Angelika
LikeLiked by 1 person
A wonderful construction! Does it work for a rectangle? or only a square? Have not been able to replicate for a rectangle. Thanks
LikeLike